



You can install your VPS from your own ISO image, such as a different Linux distribution, a Windows installer, or a rescue or tools disk. Upload the ISO from your computer or have our server download it from a link, insert it into one of your server's virtual CD drives, and boot from it. Your server has two CD drives, so you can, for example, have a Windows installer and its drivers inserted at the same time.
- Open your server and click Custom ISO Images.
- Add an ISO: Upload file from your computer, or Download from URL.
- When it shows Ready, click Insert (you can use CD drive 1 or 2).
- Stop your server, then Start it, and open the Console.
- When you're done, click Eject, then Stop and Start your server again.
Before you start
- Your VPS must be active.
- The file must be an ISO image (
.iso). - The page shows your limits, for example: "Up to 3 images, 10 GB each. Using 2.65 GB of 20.00 GB." If you reach a limit, delete an ISO you no longer need.
- Booting from an ISO starts the installer or tool on that disk. Installing a new operating system can erase your server's data, so take a backup first if you need anything on the server.
Step 1: Open Custom ISO Images
- Log in to the client area and go to Services → My Services.
- Click your VPS.
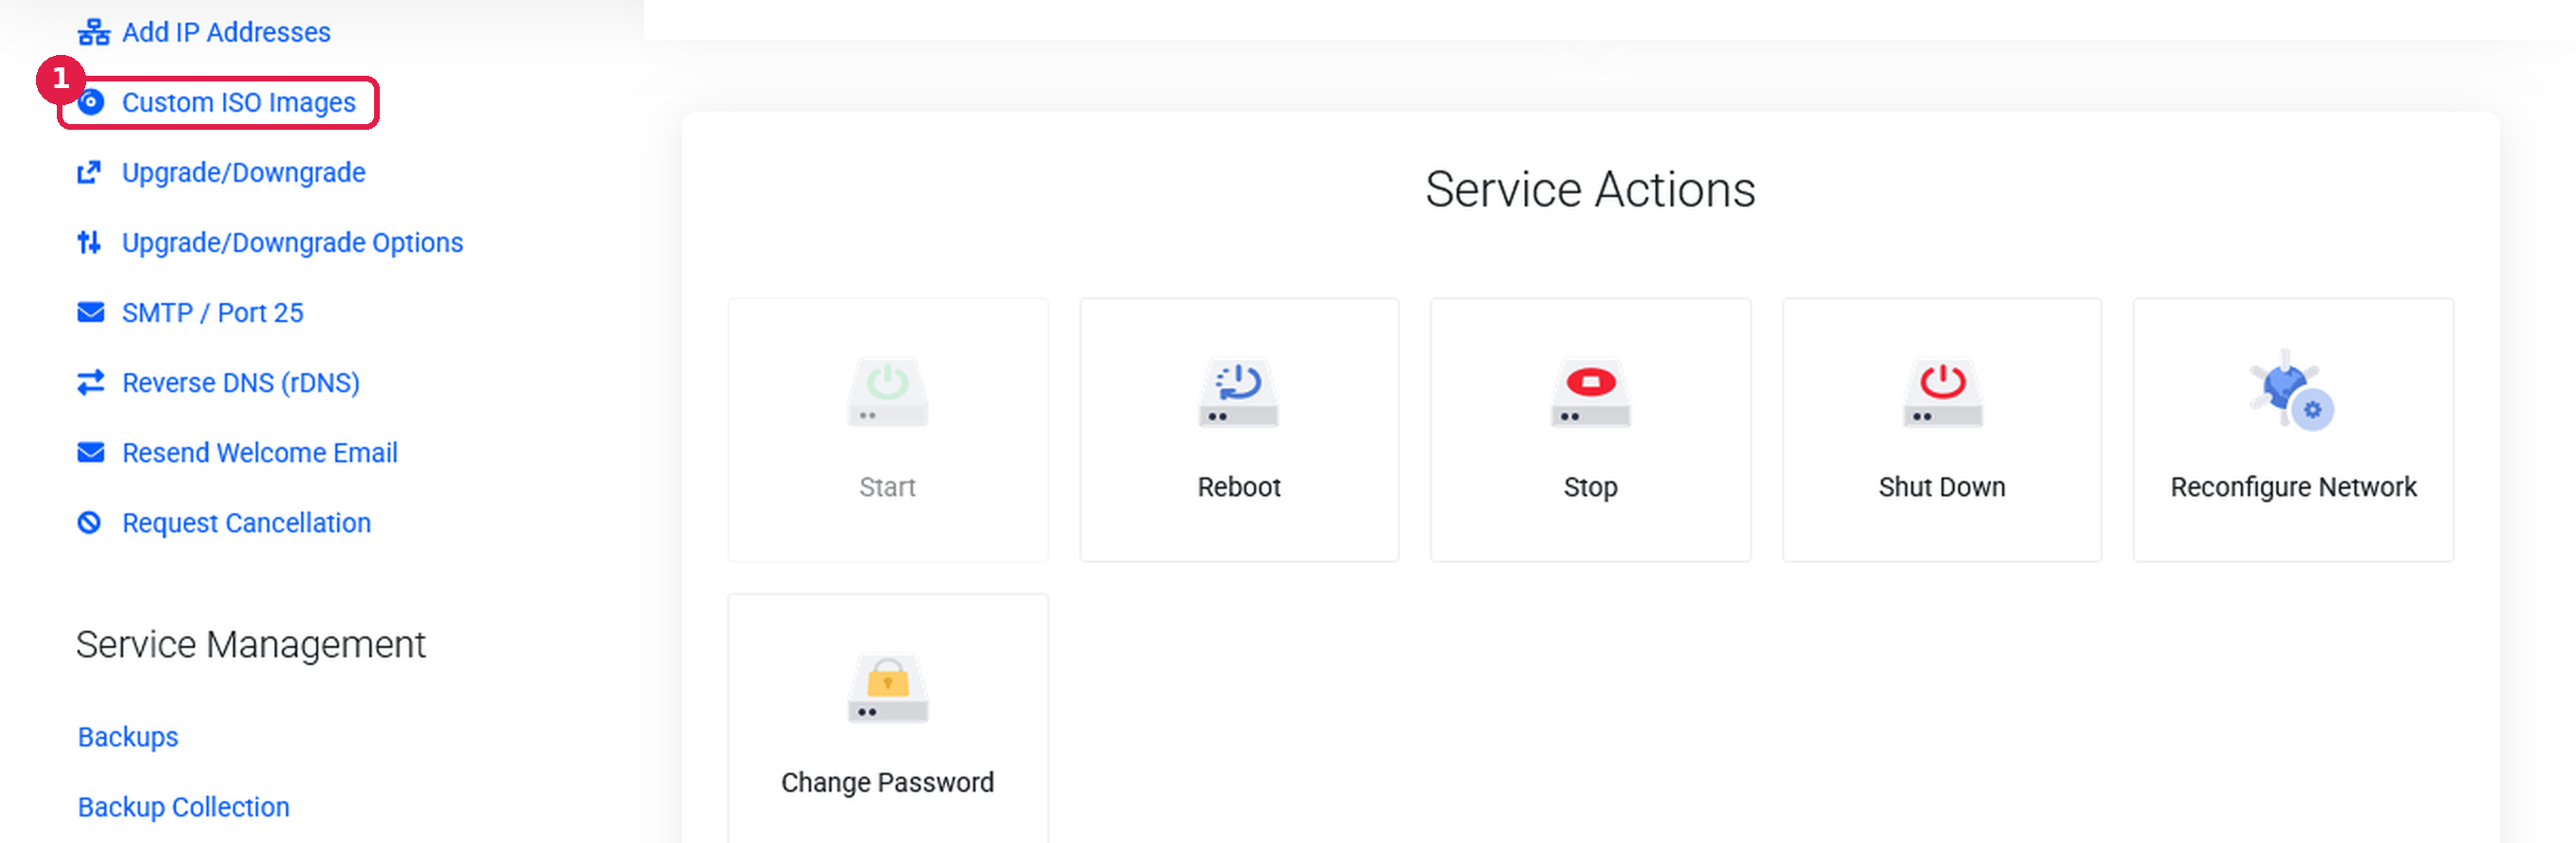
- Click Custom ISO Images in the menu on the left (1).
Step 2: Add an ISO image
There are two ways to add an image. For large images, Download from URL is usually much faster, because our server downloads the file directly.
Option A: Upload from your computer
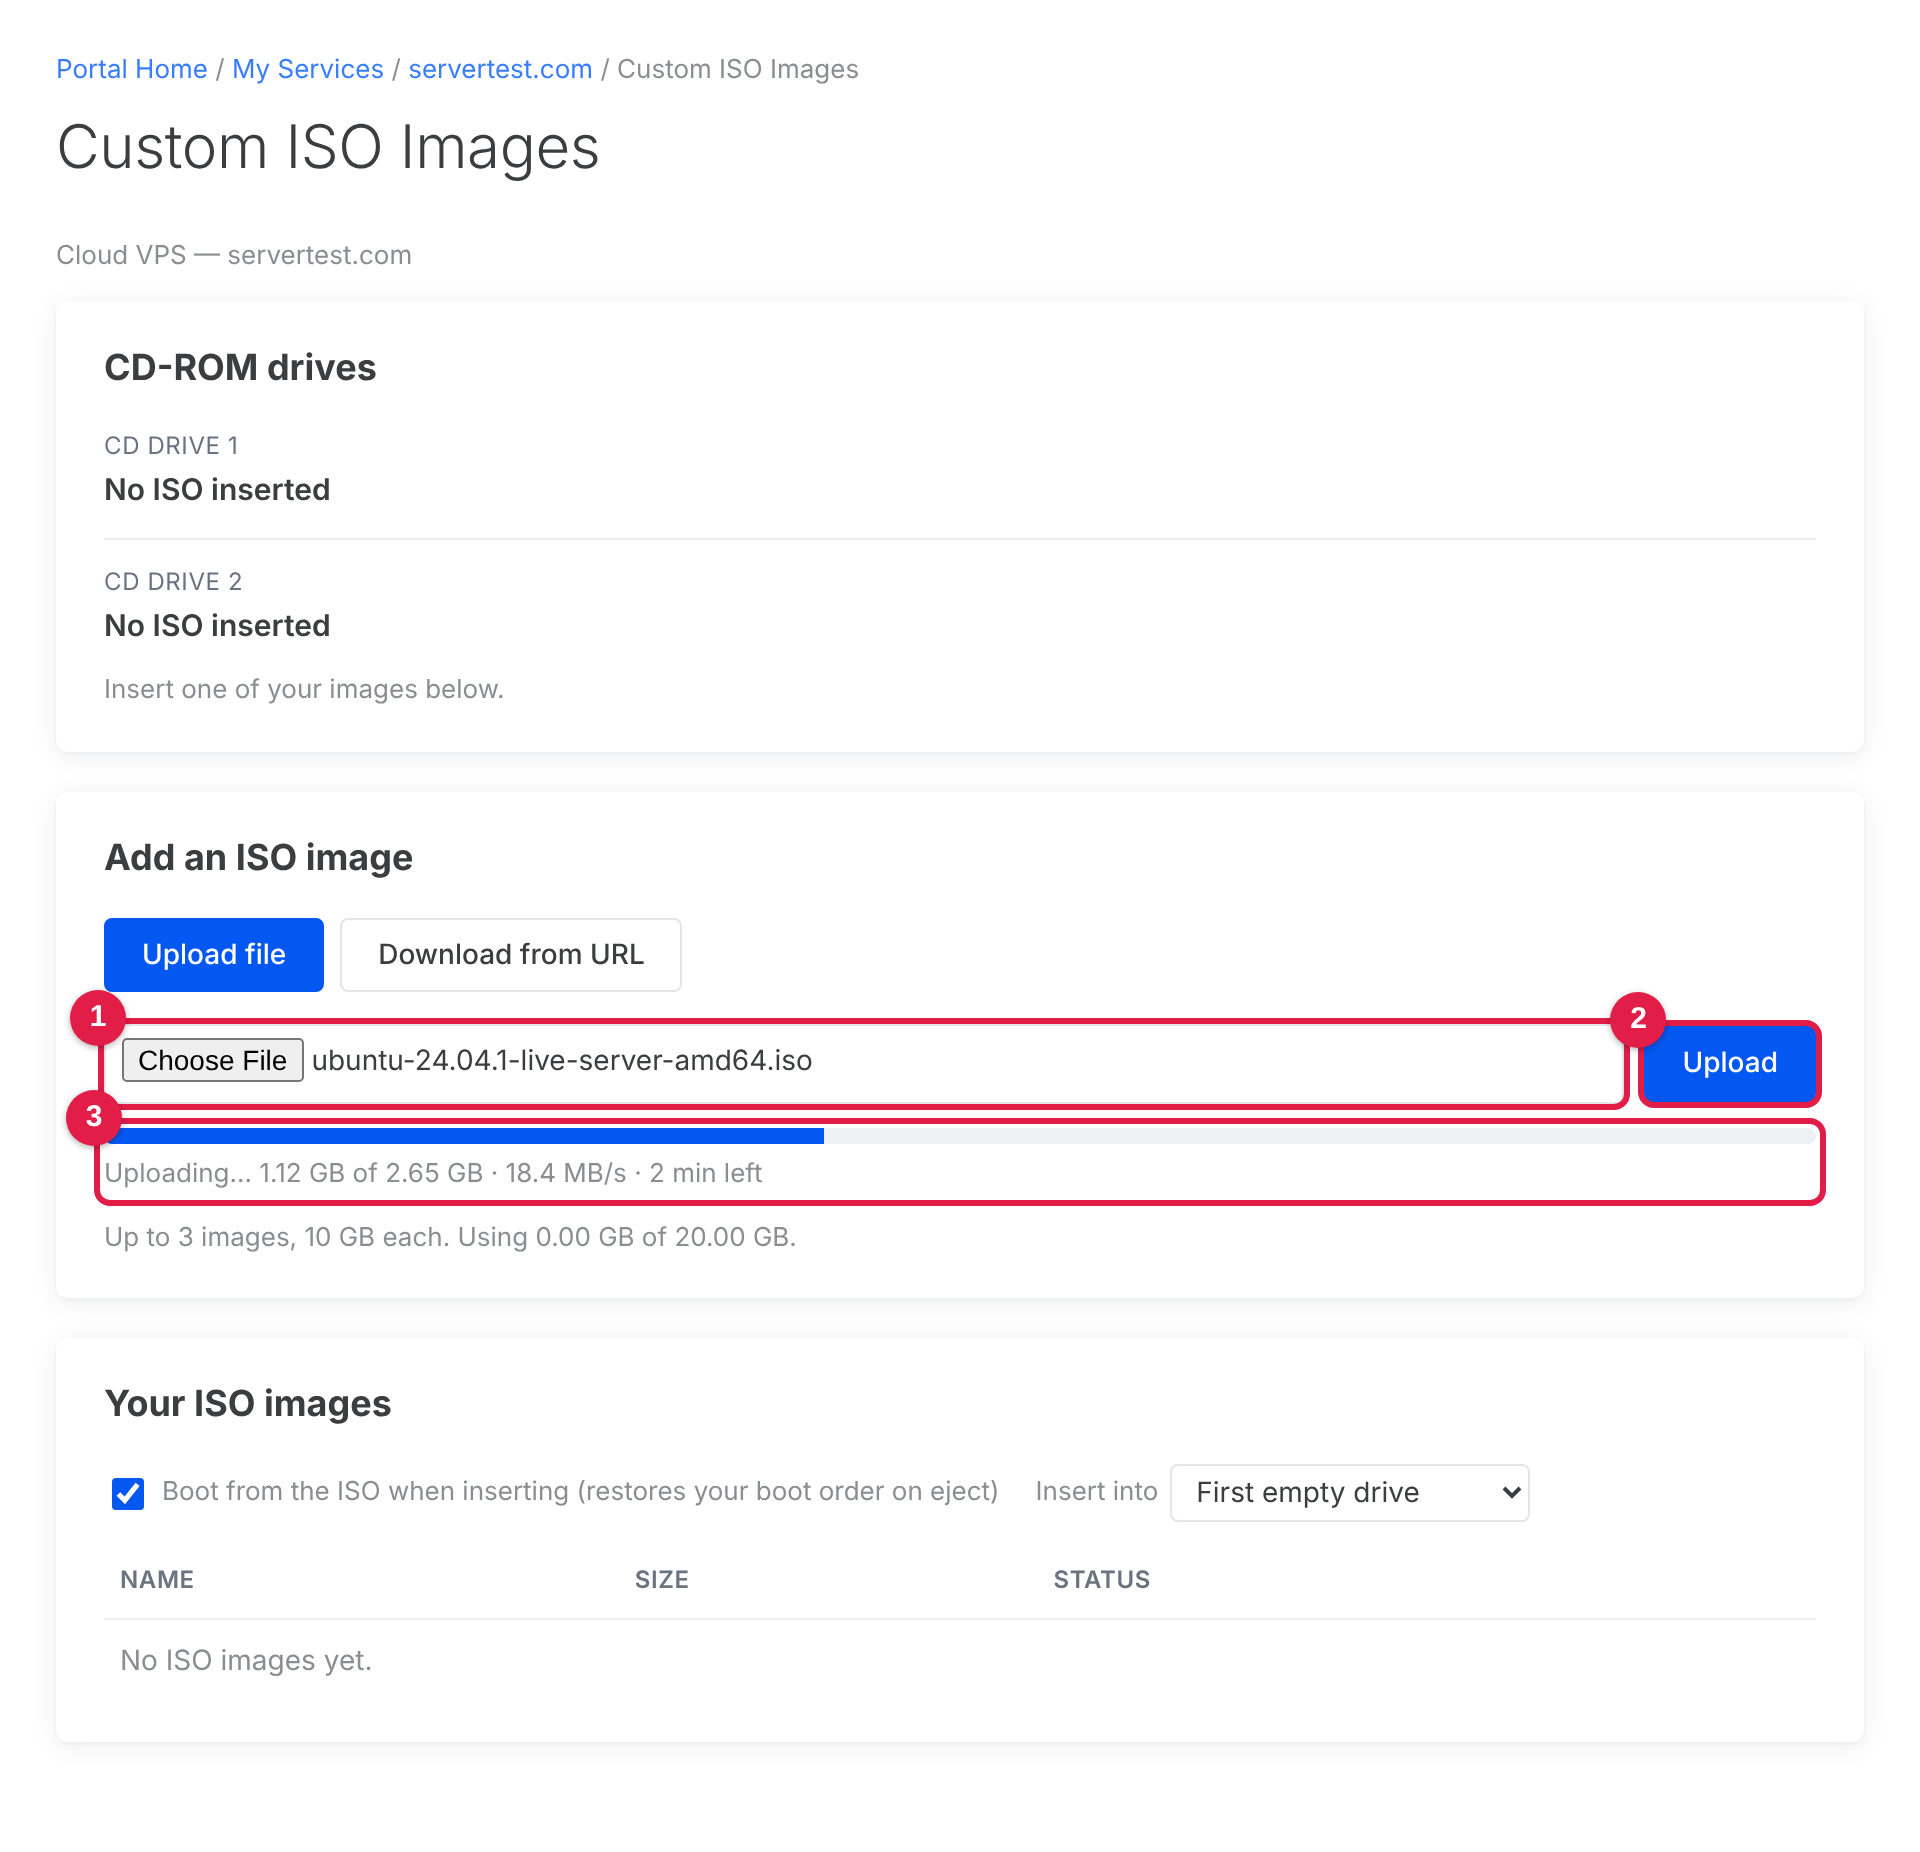
- Under Add an ISO image, make sure Upload file is selected.
- Click Choose File and select your
.isofile (1). - Click Upload (2).
- The progress bar shows how much has been uploaded, the speed and the time left (3).
Option B: Download from a URL
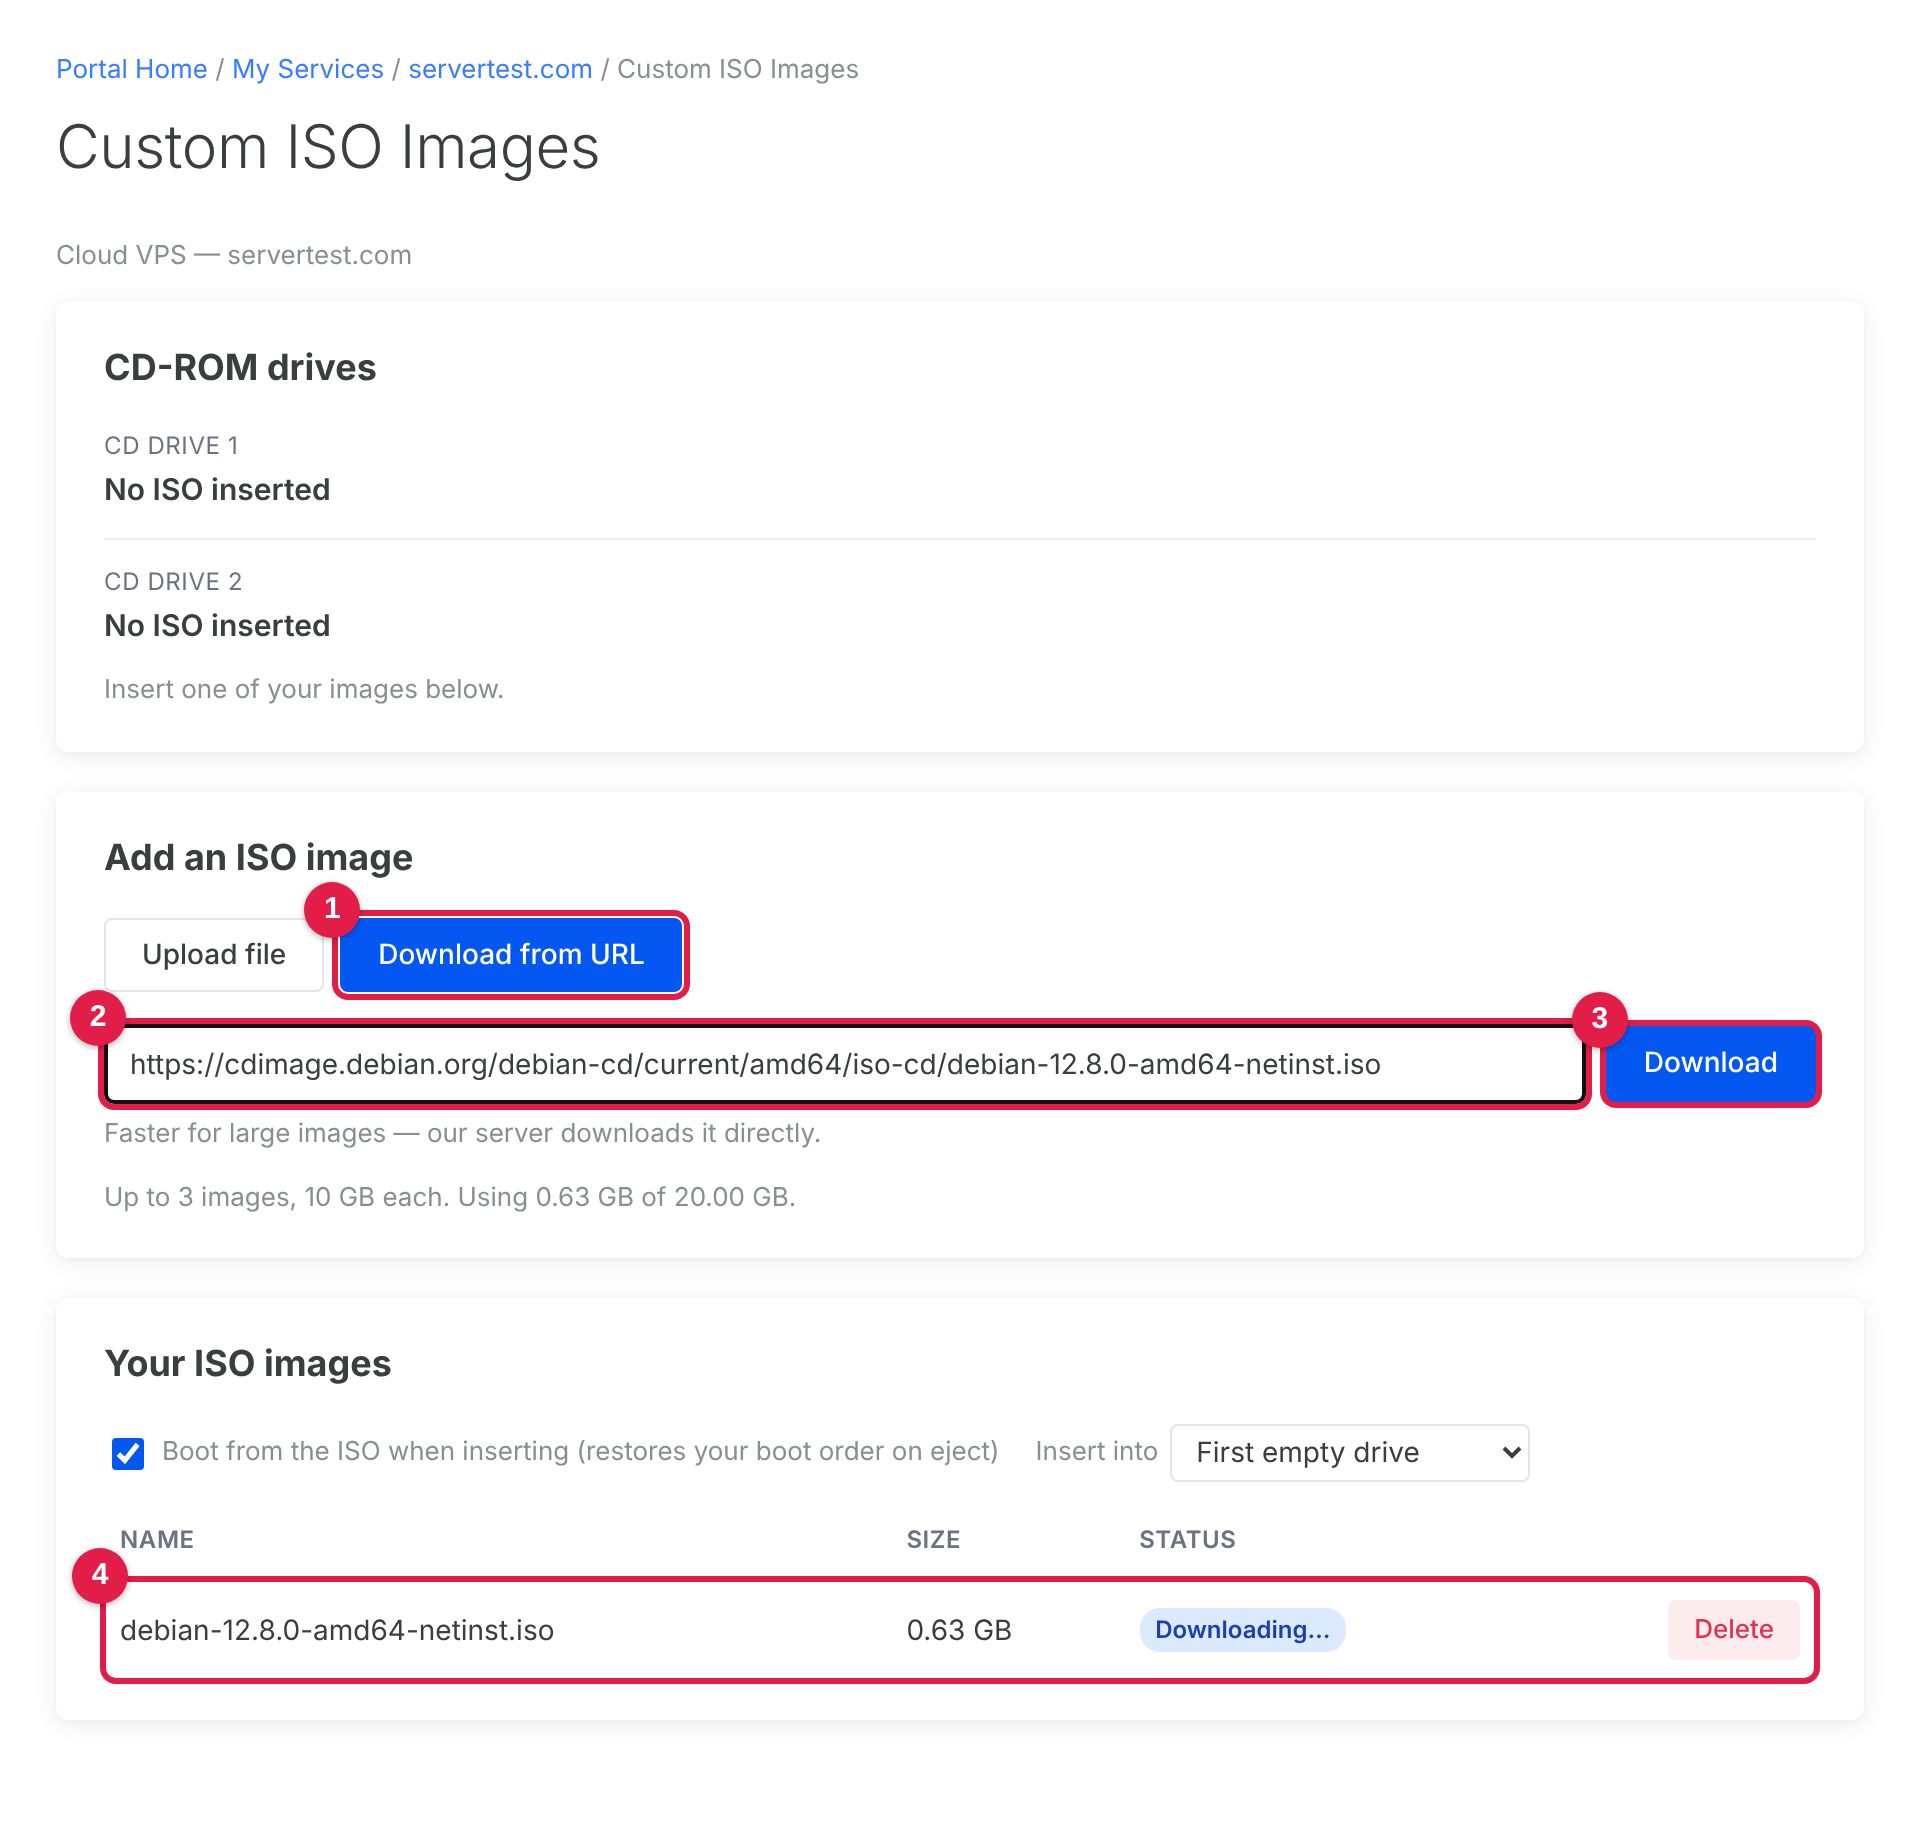
- Click Download from URL (1).
- Paste a direct link to the
.isofile (2), for example a download link from the operating system's official website. - Click Download (3).
- The image appears in Your ISO images as Downloading… (4). You can leave the page; the download continues on our side.
The link must:
- start with
http://orhttps:// - point straight to the ISO file. Share pages and links that need a login (such as Google Drive, Dropbox or OneDrive share links) will not work.
- be on the public internet.
Step 3: Insert the ISO
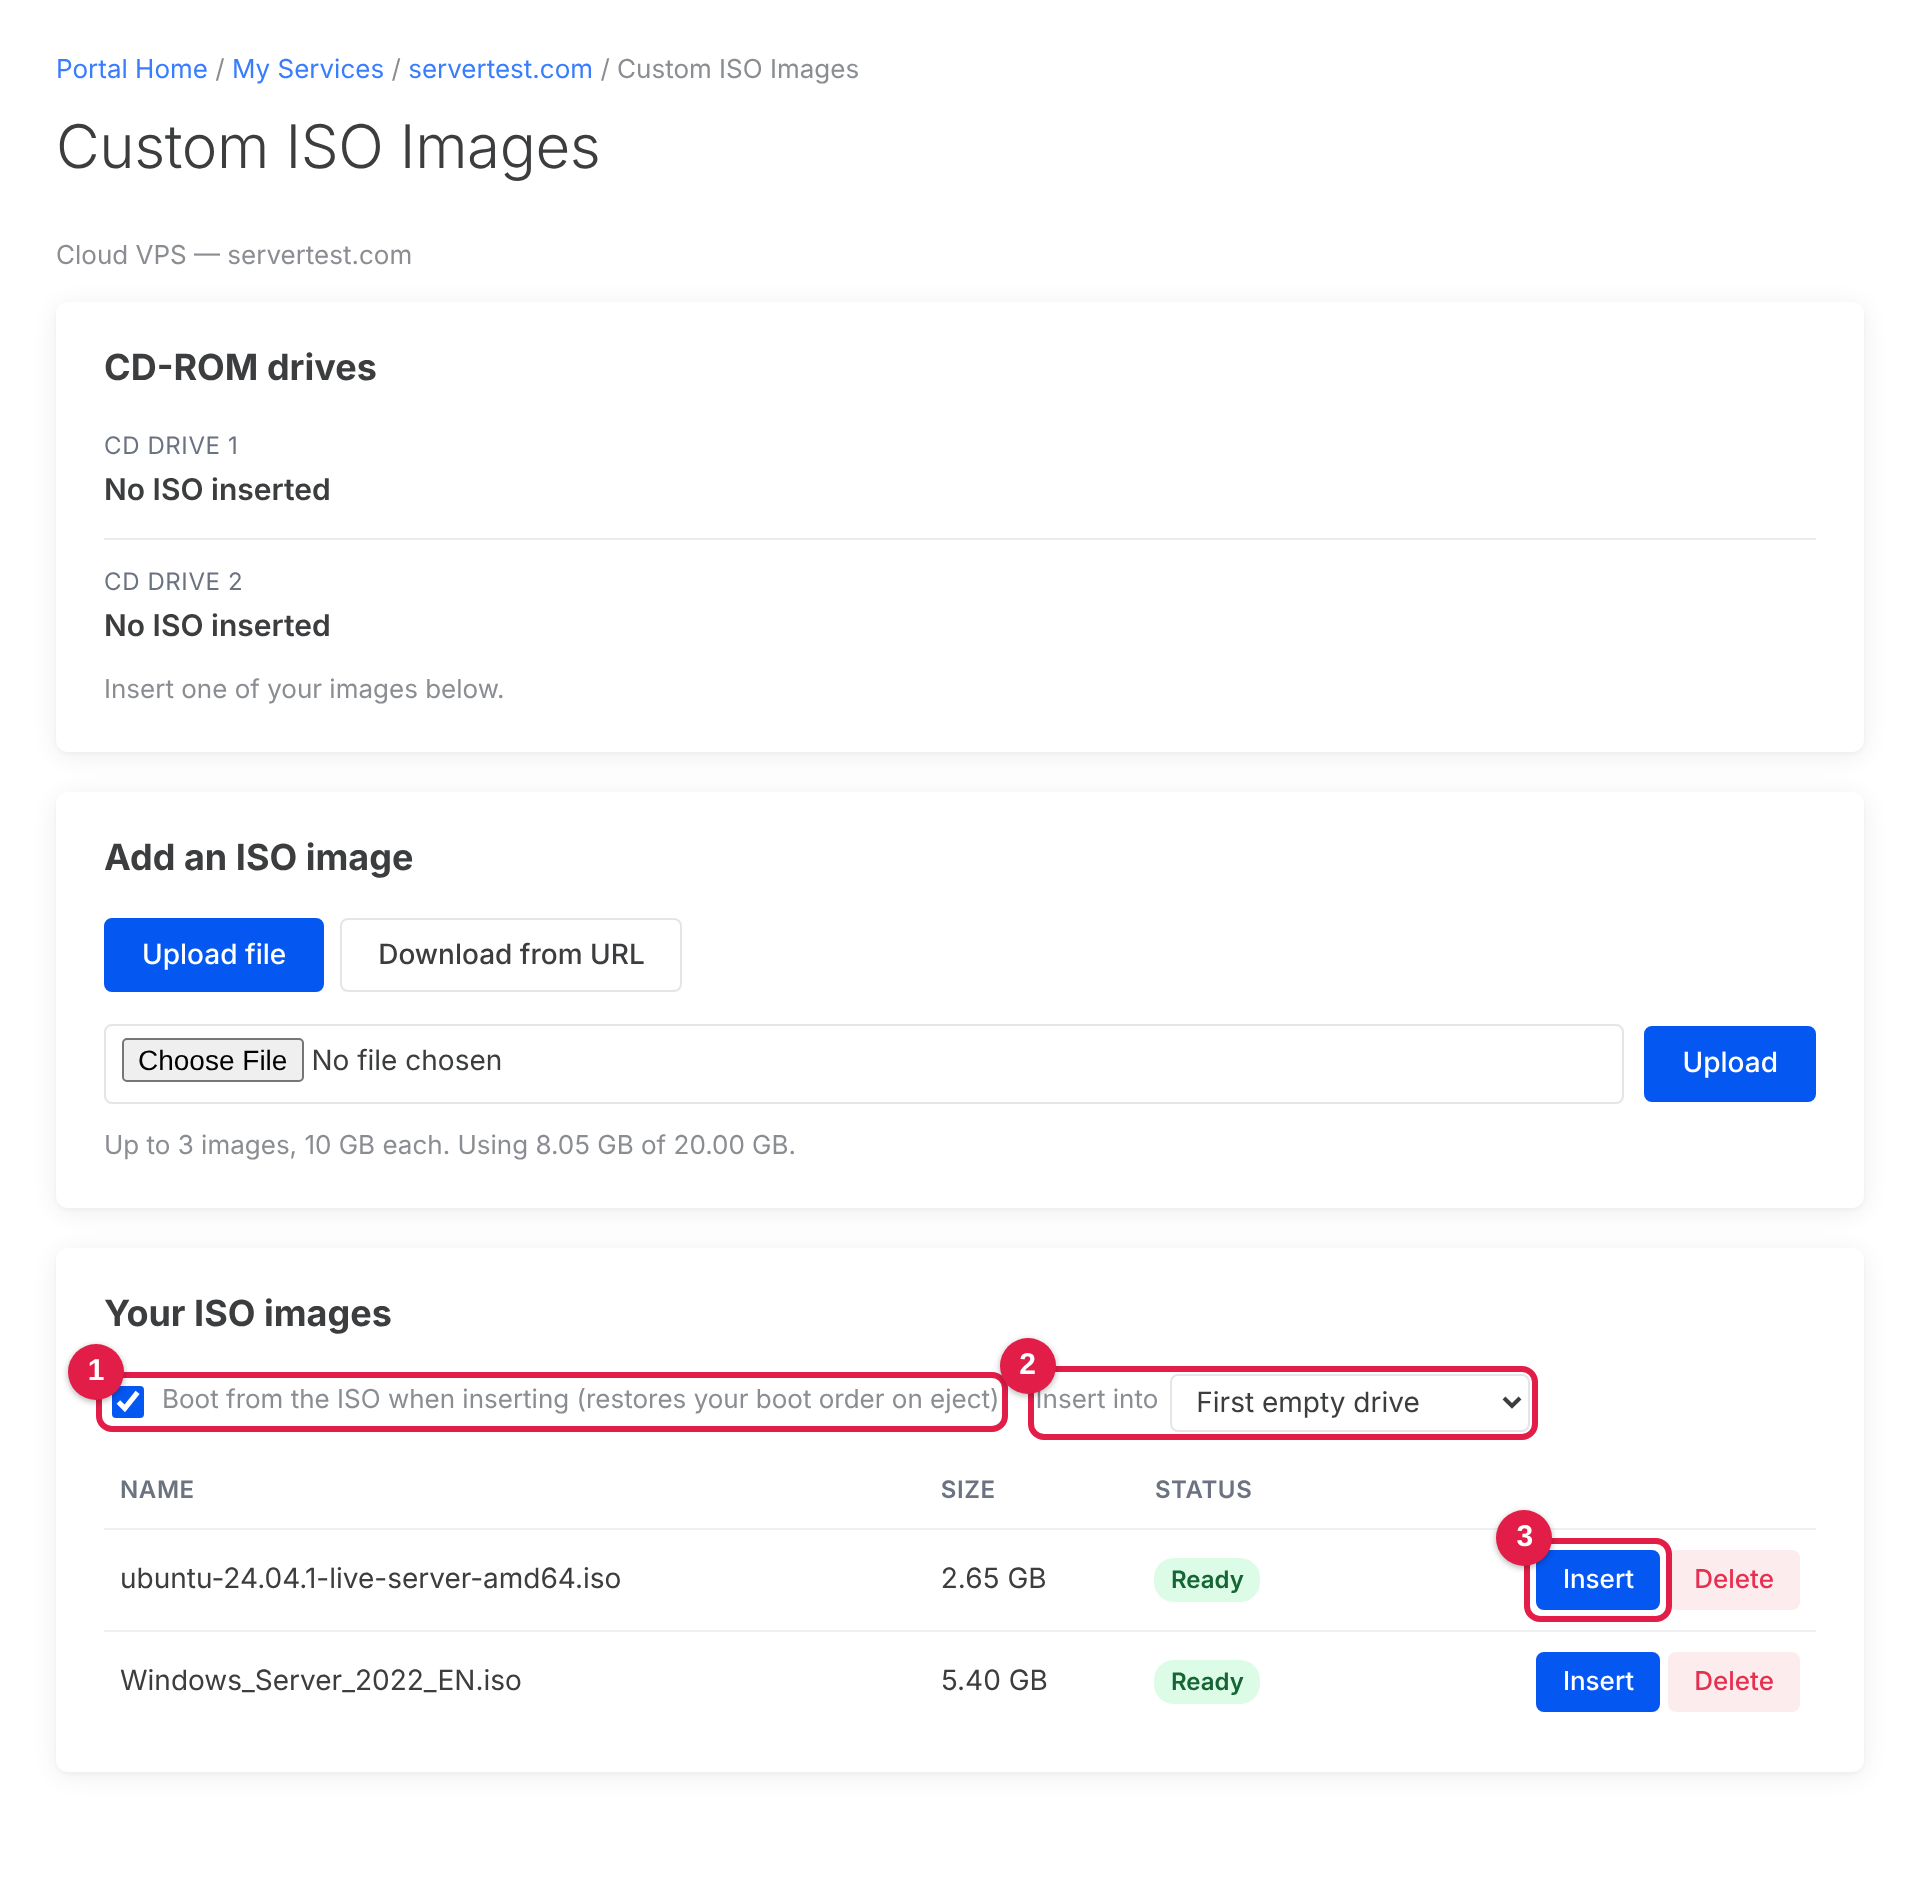
- Wait until your image shows Ready.
- Leave Boot from the ISO when inserting ticked (1) if you want your server to start from the ISO, for example to install an operating system. Untick it if you only want the disk available inside your running system.
- Insert into (2): leave it on First empty drive, or choose a specific CD drive. Choosing a drive that already has an ISO replaces it.
- Click Insert next to the image (3).
Step 4: Start your server from the ISO
- Go back to your server's page and click Stop. Wait until the server is stopped, then click Start.
A full Stop and Start is needed. Restarting from inside your operating system does not apply the change. - Click Console to see the screen. The installer or tool from your ISO should appear.
- Follow the steps in the installer.
Step 5: Eject the ISO when you're done
When the installation is finished, eject the ISO so your server starts from its own disk again.
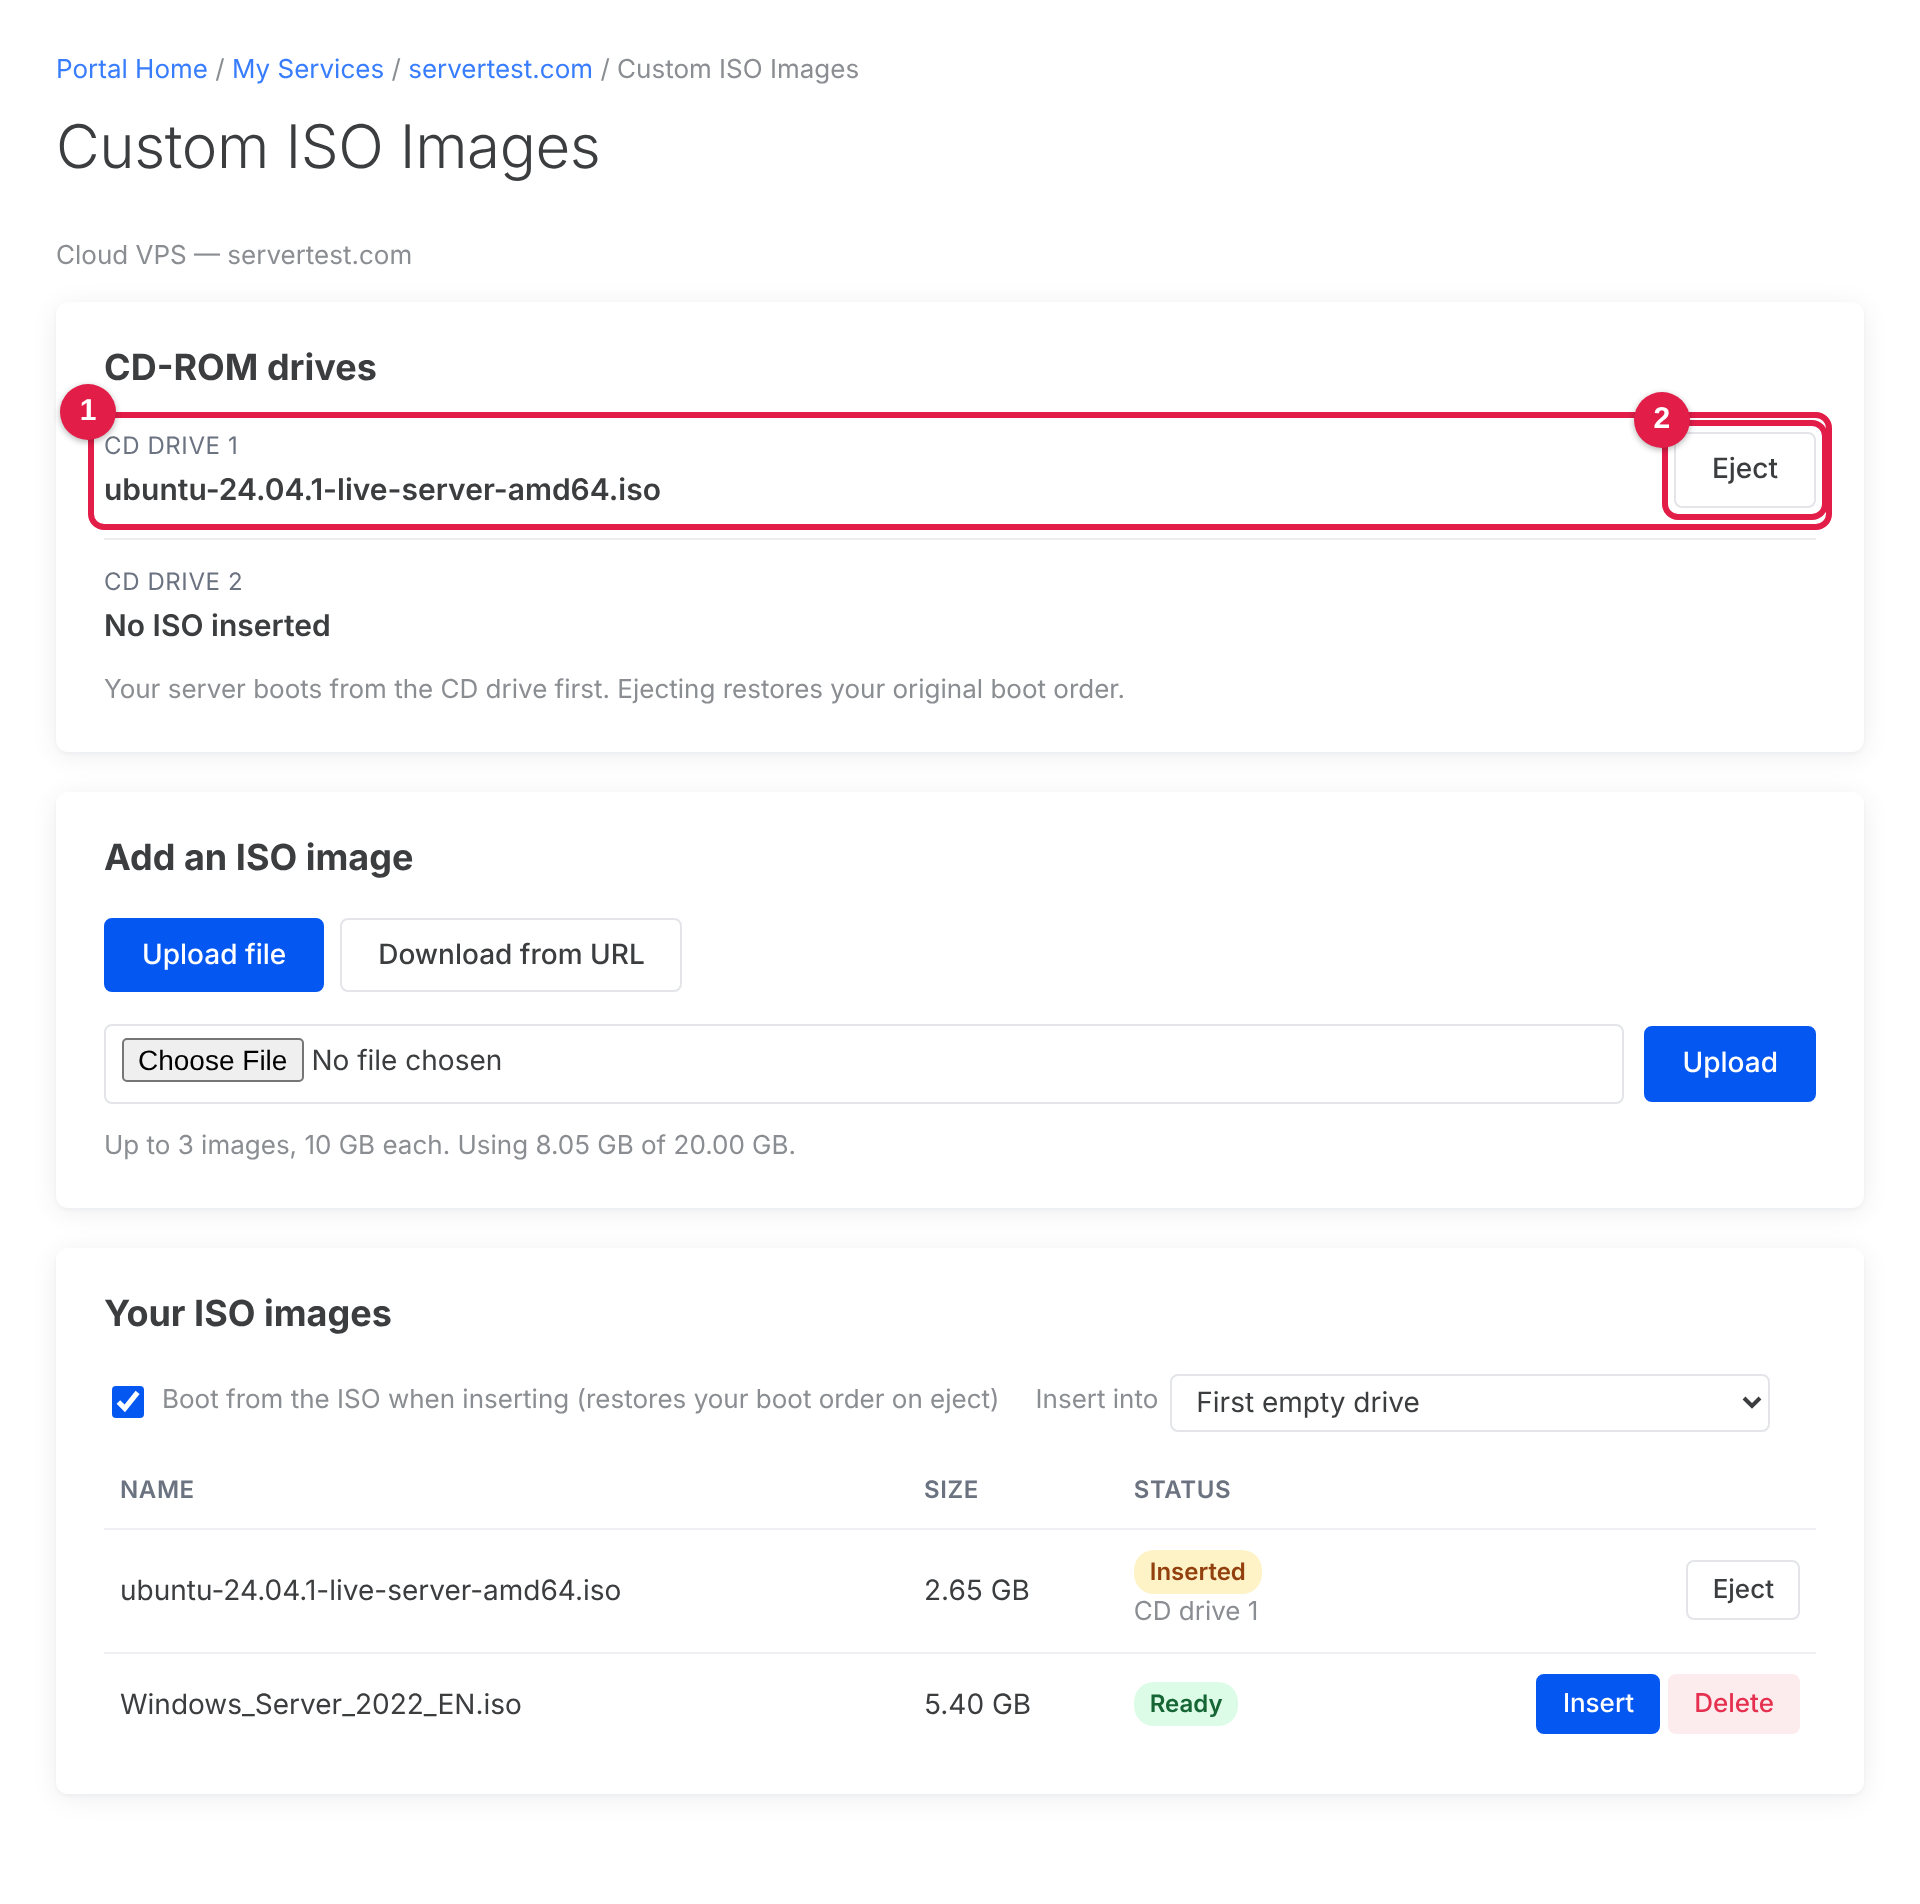
- Open Custom ISO Images. The CD-ROM drives box shows what is in each drive (1).
- Click Eject next to the drive (2). Once the last ISO is ejected, your original boot order is restored automatically.
- Stop and Start your server again.
Using two CD drives
Your server has two CD drives: CD drive 1 and CD drive 2. You can insert a different ISO in each and eject them separately. The most common use is installing Windows, which often needs VirtIO drivers to see your server's disk and network.
Example: Windows with VirtIO drivers
- Add your Windows ISO, and add the VirtIO driver ISO with Download from URL using the official link:
https://fedorapeople.org/groups/virt/virtio-win/direct-downloads/stable-virtio/virtio-win.iso - Insert the Windows ISO with Boot from the ISO ticked, into CD drive 1.
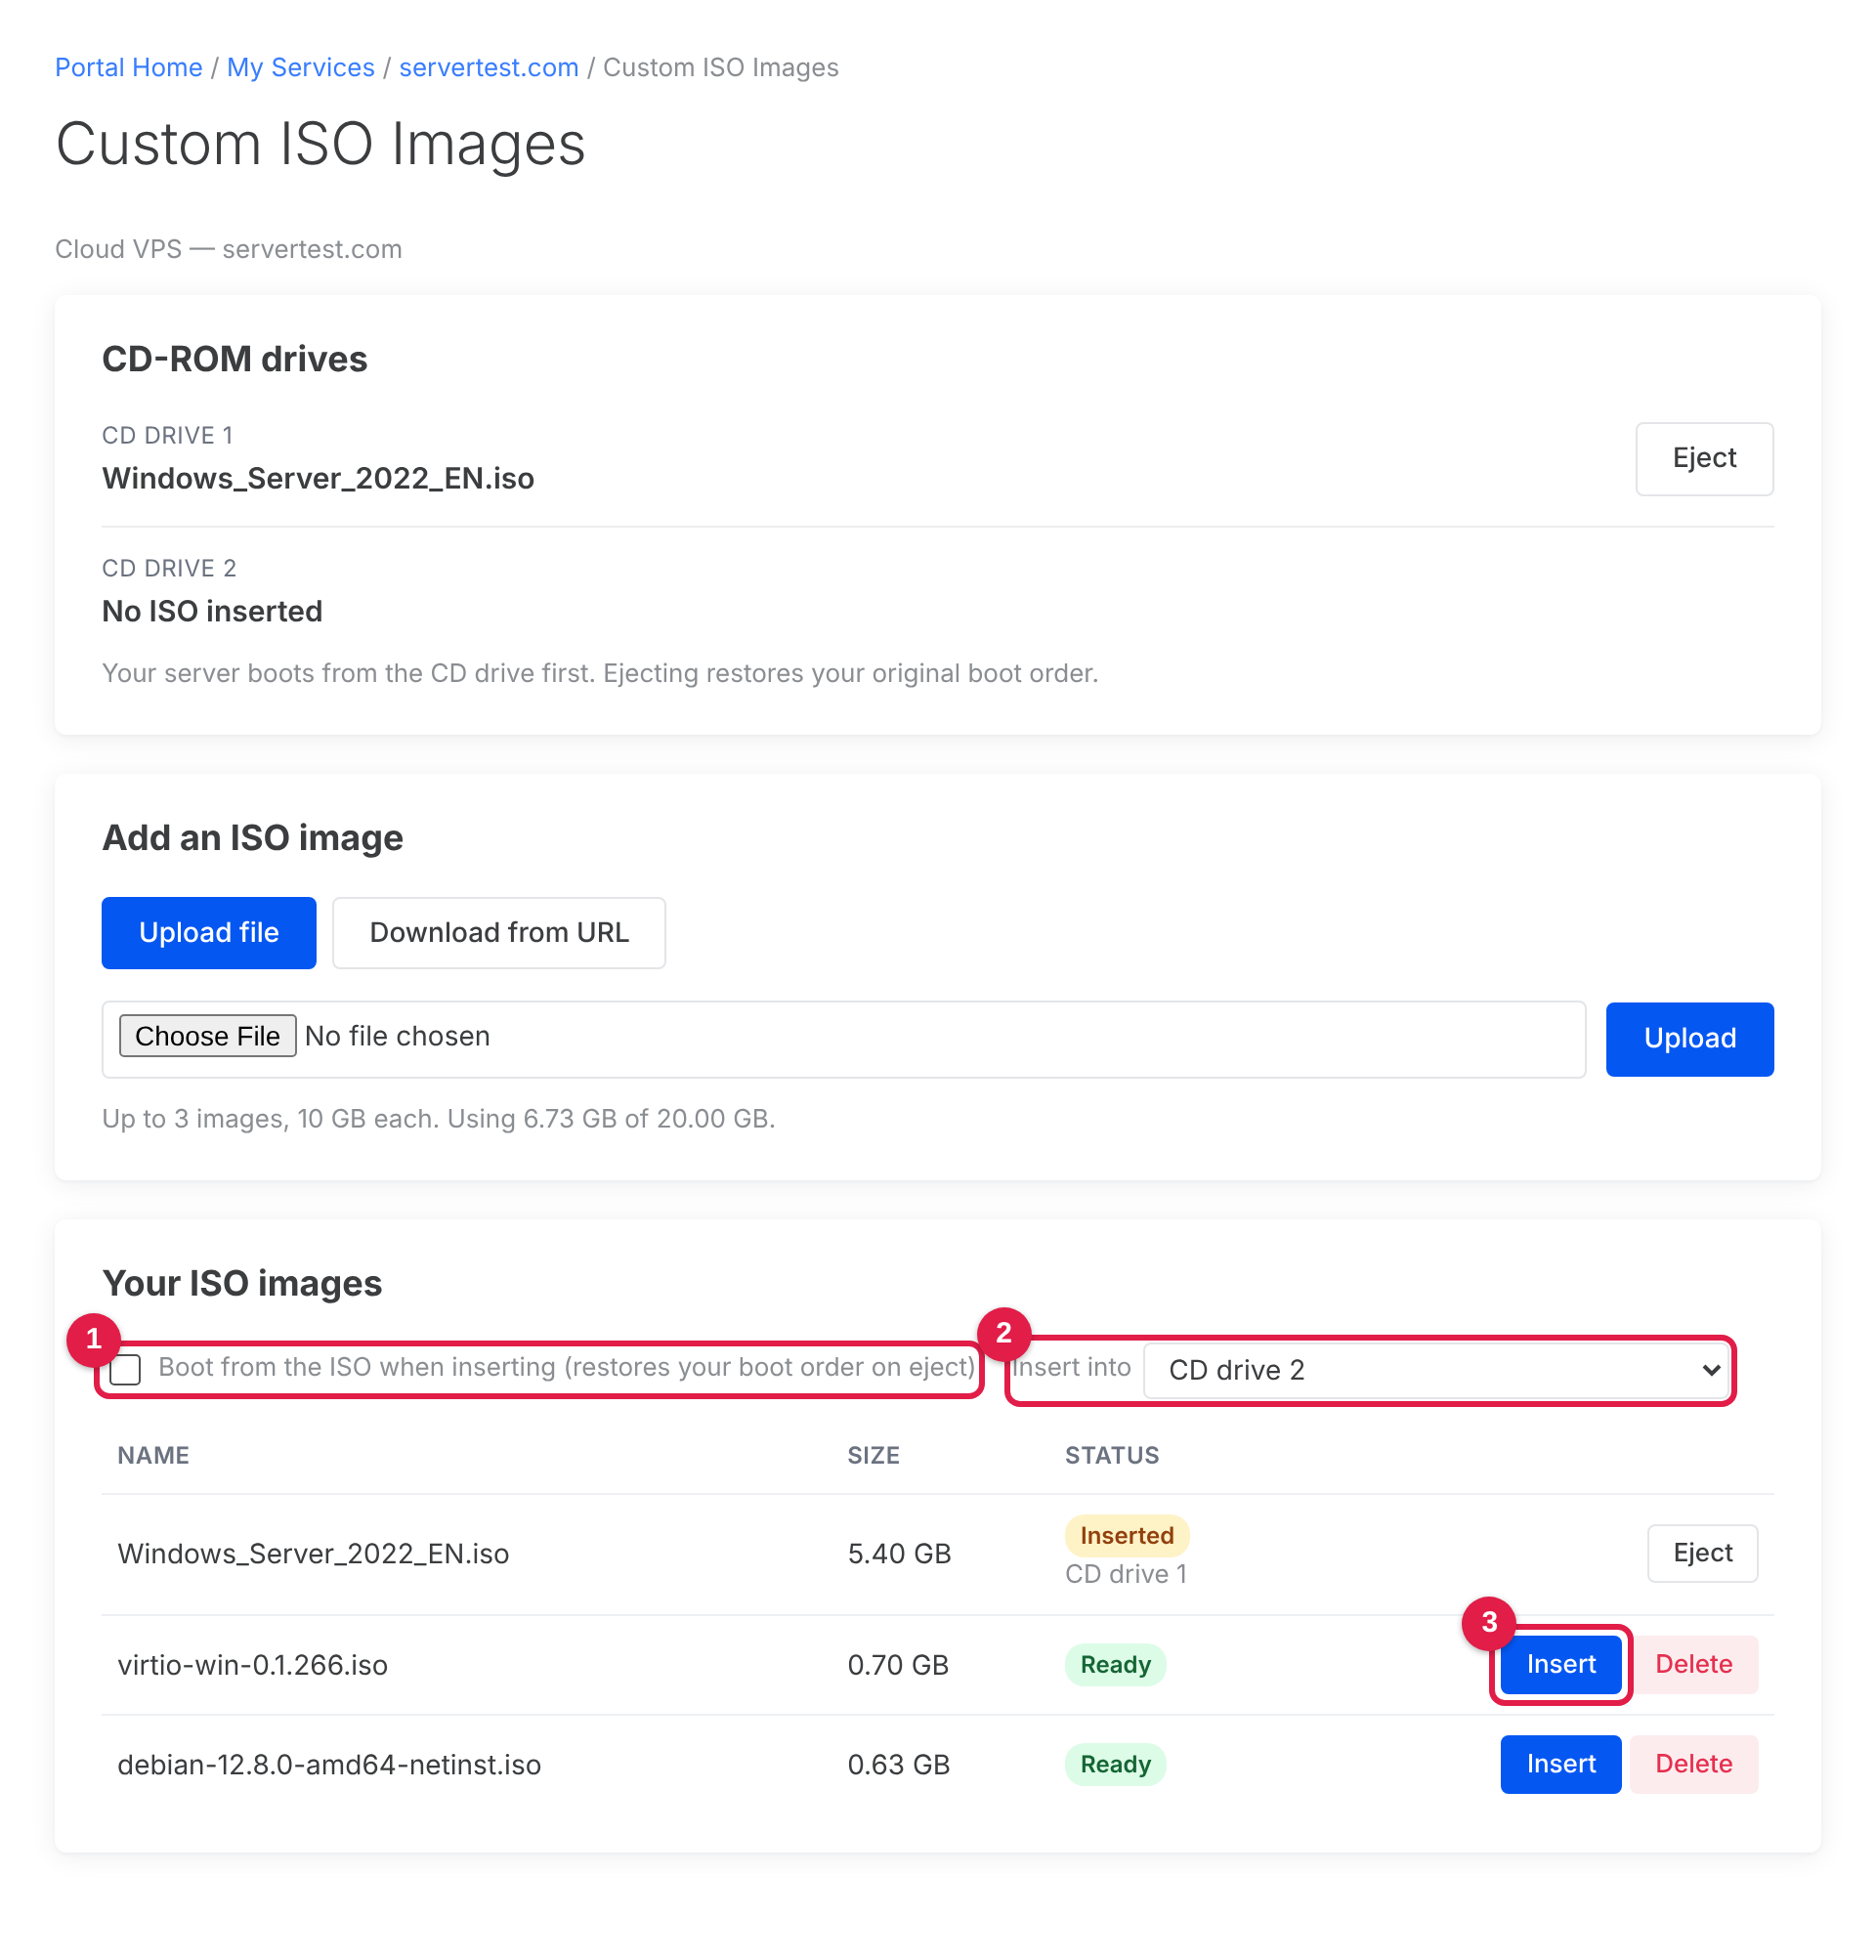
- Untick Boot from the ISO (1), set Insert into to CD drive 2 (2), and click Insert next to the VirtIO ISO (3).
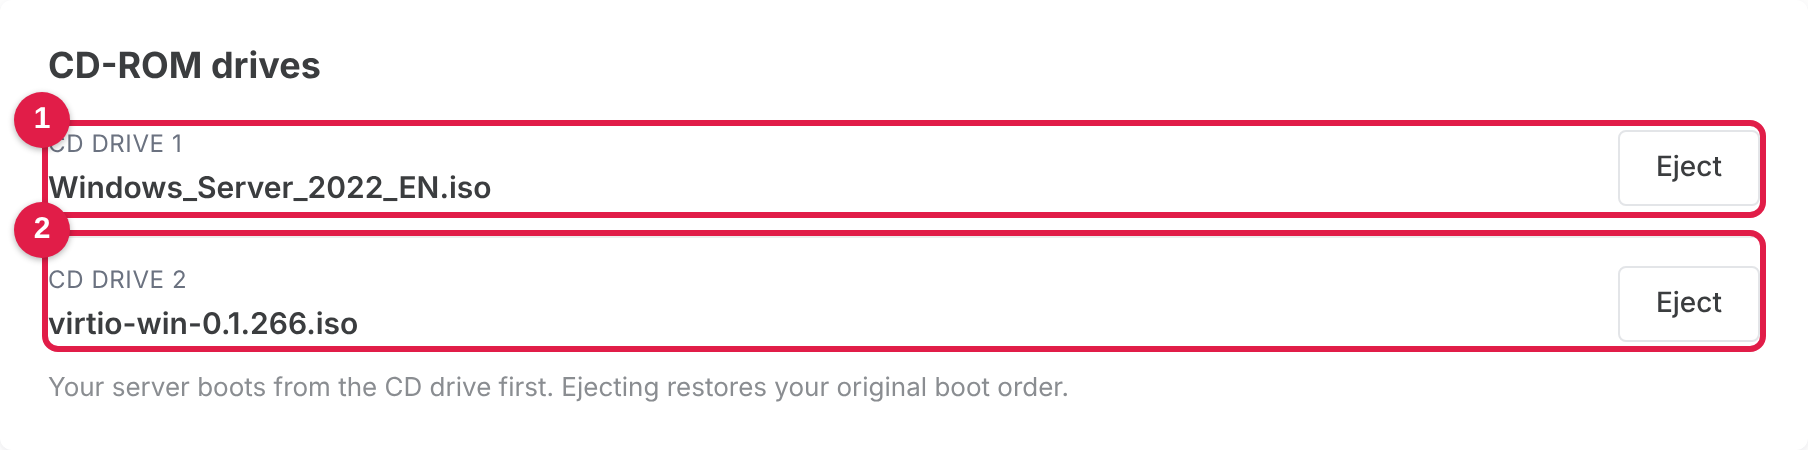
Both drives now show their ISO (1, 2):
- Stop your server, then Start it, and open the Console. Windows Setup starts from CD drive 1.
- If Windows Setup shows no disk at "Where do you want to install Windows?", click Load driver → Browse, open the VirtIO CD drive and select the
vioscsifolder, then your Windows version (for example2k22for Windows Server 2022 orw11for Windows 11), thenamd64. If no driver is found there, try theviostorfolder instead. Your disk then appears. - After Windows is installed, open the VirtIO CD drive inside Windows and run
virtio-win-guest-tools.exeto install the network and other drivers. - Eject both ISOs and Stop and Start your server.
Deleting an ISO
Click Delete next to an image to remove it and free up space. An ISO that is inserted must be ejected first.
What the statuses mean
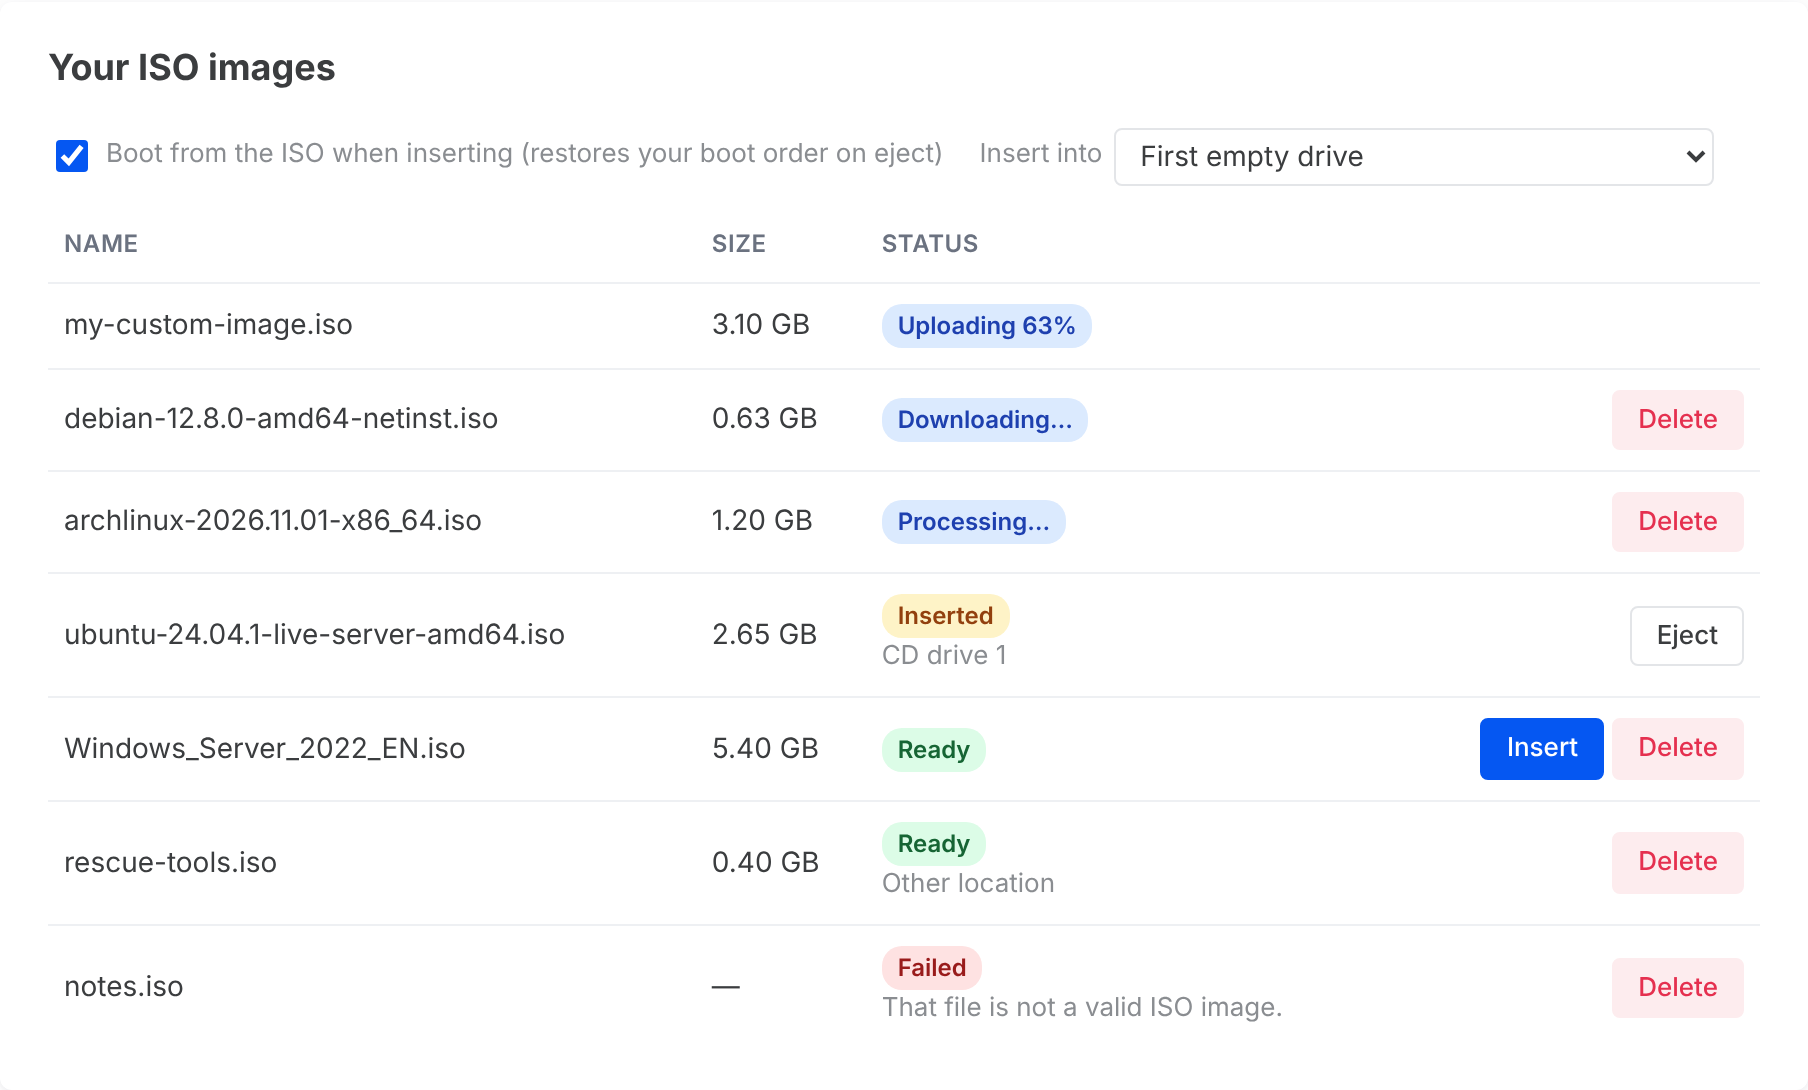
| Status | Meaning |
|---|---|
| Uploading % | Your computer is uploading the file. Keep the page open. |
| Downloading… | Our server is downloading the file from your link. You can leave the page. |
| Processing… | The file has arrived and is being moved to storage. This usually takes a few minutes. |
| Ready | The image can be inserted. |
| Inserted | The image is in one of your server's CD drives; the drive is shown underneath. |
| Ready / Other location | The image is stored in a different datacenter than this server, so it can't be inserted here. Add the ISO again from this server's page. |
| Failed | Something went wrong; the reason is shown underneath. Delete it and try again. |
Troubleshooting
| Message or problem | What to do |
|---|---|
| The server still starts from its own disk | Check that Boot from the ISO was ticked when you clicked Insert, then do a full Stop and Start from your server page. |
| "CD drive … was added to your server. It will appear after a full Stop and Start." | Stop and Start your server once; the drive then appears. |
| "All CD drives are in use" or "The CD drive is in use" | Eject an ISO first, or choose a drive under Insert into to replace what's in it. |
| "This ISO is already in CD drive …" | The image is already inserted; nothing more to do. |
| Windows setup does not show any disk to install to | Windows needs the VirtIO disk driver. See Example: Windows with VirtIO drivers above. |
| "You can keep up to … ISO images" or "…exceed your … ISO storage quota" | Delete an ISO you no longer need, then try again. |
| "That file is not a valid ISO image." | The file is not an ISO image or is damaged. Download it again from the official source. |
| "Could not reach that URL from our server." | Check that the link works in your browser and points straight to the .iso file. |
| "That URL points to a private or reserved address." | Use a link on the public internet. |
| "Our upload space is busy right now." | Try again a little later, or use Download from URL. |
| The upload stopped or failed partway | Delete the failed image and upload again with the page kept open. A wired connection helps with very large files. |
| "…not enabled for your account" or there is no Upload file tab | Custom ISOs or uploads from your computer are not enabled for your account. Contact support. |
Good to know
- Use an ISO on more than one server: your ISO images belong to your account, not to one server. Open Custom ISO Images from any of your other VPSes in the same location and the ISO is already there, ready to insert, with no need to upload it again. If it shows Other location, that server is in a different datacenter, so add the ISO again from that server's page.
- When your account is closed, all of your ISO images are deleted. Keep your own copy of any ISO you may need later.
- Only upload software you have the right to use, such as licensed Windows media or freely available Linux images.
- If you need help, open a support ticket and include your server's name and the ISO you're using.
